What sensitivity means, how to choose the right value for your product, and why higher is not always better.
Part 1: What Is Microphone Sensitivity?
Definition: Sensitivity tells you how much electrical output a microphone produces for a given sound pressure.
Standard test condition: 1 kHz sound, 94 dB SPL (1 Pascal) — roughly the volume of a normal conversation at 30 cm.
Common units: dBV/Pa or mV/Pa
One rule to remember: Higher (less negative) number = higher sensitivity
- -26 dBV/Pa (50 mV/Pa) → HIGH sensitivity
- -38 dBV/Pa (12.6 mV/Pa) → MEDIUM sensitivity
- -50 dBV/Pa (3.2 mV/Pa) → LOW sensitivity
Think of sensitivity as the microphone’s “volume knob.” A high-sensitivity mic turns quiet sounds into usable signals. But it also turns loud sounds into distortion.
Part 2: The Two Most Important Factors in Sensitivity Selection
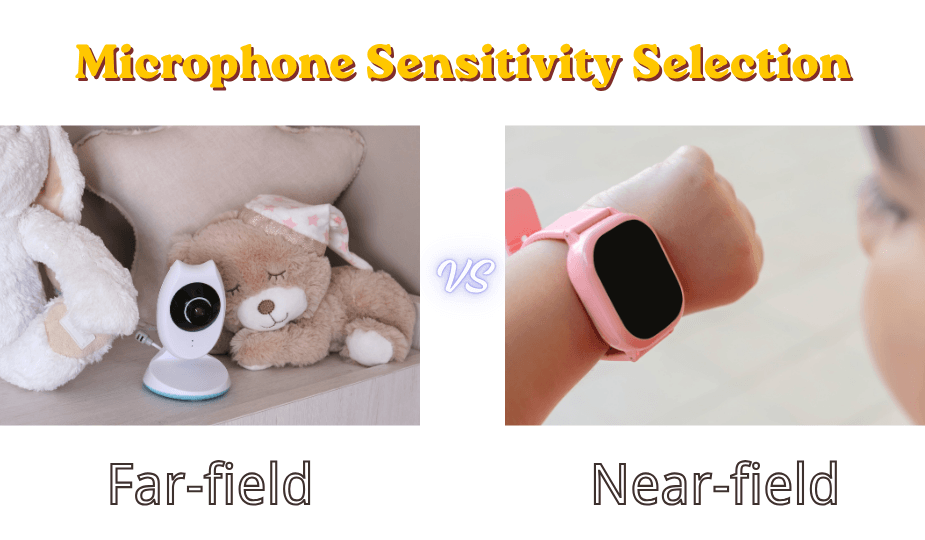
Factor 1: Distance to the sound source (far-field vs. near-field)
Sound gets quieter as distance increases. A normal voice at 10 cm is about 90 dB SPL. The same voice at 2 meters is about 65 dB SPL — 25 dB quieter.
Implication: If your microphone must pick up sound from far away (security camera, room voice control), you need higher sensitivity. If the user is always close (phone, headset), you can use lower sensitivity.
Factor 2: Does your product have a built-in speaker?
This is the most common mistake we see. Engineers choose a high-sensitivity microphone because they want “good pickup,” forgetting that their own product’s speaker is only 1-10 cm away from the microphone.
The problem: That close speaker produces 100-110 dB SPL at the microphone — much louder than the user’s voice from 50 cm away. A high-sensitivity microphone will saturate, cause echo, or start howling.
Implication: If your product has a speaker (smartphone, smartwatch, smart speaker, walkie-talkie, tablet), you need lower sensitivity — often much lower than you think.
Part 3: High Sensitivity vs. Low Sensitivity — When to Use Each
When to Choose HIGH Sensitivity (-22 to -35 dBV/Pa)
Your product looks like this:
- Security camera, baby monitor, glass break detector
- Far-field voice control module (for a TV or set-top box where the speaker is separate)
- Conference room microphone (ceiling or table, 2-3 meters from speakers)
- Recording device for quiet environments
Why high sensitivity: The sound source is far away. A low-sensitivity microphone would output only 1-2 mV from a voice at 3 meters — lost in the noise floor of your ADC or amplifier. High sensitivity brings that weak signal up to usable levels.
Typical polar pattern: Omnidirectional (you don’t know which direction the sound comes from at distance)
What to watch for: High-sensitivity microphones have lower Max SPL (usually ≤110 dB). Keep them away from loud speakers.
When to Choose LOW Sensitivity (-42 to -55 dBV/Pa)
Your product looks like this:
- Smartphone (especially for speakerphone mode)
- Smart speaker with built-in music playback
- Smartwatch or children’s wearable
- Walkie-talkie or two-way radio (mouth very close to mic)
- Car hands-free kit
- Any device where a loudspeaker sits within 10 cm of the microphone
Why low sensitivity: The close speaker or close mouth produces very high SPL at the microphone. Low sensitivity prevents ADC saturation, echo cancellation failure, and howling. You lose a few dB of far-field pickup, but your product actually works in real use.
Typical polar pattern: Often still omnidirectional, but some designs use unidirectional to reject speaker direction
When to Choose MEDIUM Sensitivity (-35 to -42 dBV/Pa)
Your product looks like this:
- Traditional phone handset
- Bluetooth headset (not speakerphone mode)
- Computer microphone (laptop internal)
- Voice remote control (TV remote with mic)
Why medium sensitivity: The user is close (5-20 cm) but there is no powerful built-in speaker competing. This is the “safe middle” range that works for many voice communication products.
Part 4: Real Product Examples — Industry Estimates
Disclaimer: The values below are approximate ranges based on public teardowns, acoustic analysis, and industry reference designs. Actual implementations vary by product generation and acoustic architecture.
| Product Category | Has Own Speaker? | Estimated Sensitivity Range | Design Rationale |
|---|---|---|---|
| Security camera (e.g., Arlo, Ring-class devices) | No (or very small beeper) | -26 to -30 dBV/Pa | Must pick up voices from 3-5 meters away |
| Far-field smart speaker (first gen, limited playback) | No external high-power speaker | -30 to -35 dBV/Pa | Optimized for wake word detection at distance |
| Smart speaker with integrated music playback (Echo-class devices) | Yes, high-power speaker close to mic | -42 to -48 dBV/Pa | Lower sensitivity prevents music from saturating mic |
| Smartphone internal mic (normal call and speakerphone) | Yes (earpiece and bottom speaker) | -38 to -42 dBV/Pa | Balanced for near-field speech and echo prevention |
| Smartwatch / children’s wearable (Gizmo-class devices) | Yes, extremely close (3-8mm) | -50 to -55 dBV/Pa | Speaker-to-mic distance is tiny — howling prevention |
| Walkie-talkie / two-way radio | Yes (earpiece speaker) | -50 to -60 dBV/Pa | Mouth is 2-5 cm away, speaker also very close |
| TV voice remote | No (TV speaker is separate) | -32 to -38 dBV/Pa | User holds remote near mouth, but needs some range |
Part 5: The “My Product Has a Speaker” Problem — A Deeper Look
This deserves its own section because it is the #1 reason customers return to lower-sensitivity parts.
The scenario: You are designing a product that has both a microphone and a loudspeaker in the same housing. Examples: a smart speaker, a smartphone, a smartwatch, a children’s tablet, a two-way radio, a Bluetooth speaker with microphone.
The wrong instinct: “I want the microphone to pick up the user’s voice well, so I will choose a high-sensitivity microphone.”
What actually happens:
- The speaker is 1-15 cm from the microphone
- At moderate volume, the speaker produces 95-110 dB SPL at the microphone
- The user’s mouth is 30-100 cm away, producing 60-80 dB SPL at the microphone
- The speaker is 20-40 dB louder at the microphone than the user’s voice
The failure modes:
- Echo: The far-end caller hears their own voice delayed
- Howling: When the user raises volume, loop gain exceeds 1 → sustained squeal
- Saturation: The ADC clips on loud music or speech from the speaker
- Wake word failure: The voice assistant cannot hear the wake word over its own music
The fix (industry best practice):
- Start with a sensitivity that seems too low — typically -45 to -50 dBV/Pa
- If your echo canceller is strong, you can go up a few dB
- Never assume a “standard” -38 dBV/Pa mic will work in a speaker product
Part 6: Common Mistakes
Mistake 1: “Higher sensitivity is better because it picks up more sound.”
Why wrong: Higher sensitivity also picks up more noise, saturates on loud sounds, and has lower Max SPL. A product that works well in a quiet lab may fail in a car, near a speaker, or in a crowd.
Mistake 2: “I will just use digital gain if the microphone is too low.”
Why wrong: Digital gain amplifies noise by the same amount as signal. You cannot recover SNR that was lost in the analog domain. If your microphone output is buried in the ADC’s noise floor, no amount of digital gain will fix it.
Mistake 3: “My echo canceller is good, so I can use a high-sensitivity microphone.”
Why wrong: Echo cancellers have dynamic range limits. If the speaker saturates the microphone’s output or the ADC input, no algorithm can recover linearity. You must prevent saturation in hardware.
Mistake 4: “The same microphone works for all my products.”
Why wrong: A microphone that works perfectly in a security camera (far-field, no speaker) will howl immediately in a smartwatch. Sensitivity selection is product-specific.
Part 7: A Note on Polar Pattern (Omnidirectional vs. Unidirectional)
Sensitivity and polar pattern are separate specifications, but they interact in real products.
- Omnidirectional microphones: Pick up sound equally from all directions. Best for far-field applications where you don’t know the sound direction. Most ECM and MEMS microphones are omnidirectional.
- Unidirectional microphones: Reject sound from the rear. Useful when you know the sound direction (e.g., the user’s mouth) and want to reject noise or a loudspeaker. Often have slightly lower sensitivity for the same diaphragm size.
Recommendation for most products: Start with omnidirectional. It is simpler, cheaper, and works well with proper sensitivity selection. Only move to unidirectional if you have a specific rejection requirement (e.g., a loud fan behind the microphone).
Part 8: Sensitivity Selection Checklist
Run through this checklist before finalizing your microphone BOM.
- What is the typical distance from the user’s mouth to the microphone?
– If >1 meter → high sensitivity (-26 to -32 dBV/Pa)
– If 15-50 cm → medium sensitivity (-35 to -42 dBV/Pa)
– If <10 cm → low sensitivity (-42 to -55 dBV/Pa) - Does your product have a built-in speaker?
– If YES, and the speaker is within 10 cm of the microphone → subtract 5-10 dB from your initial sensitivity estimate
– For smartwatches or very compact devices → start at -50 dBV/Pa or lower - What is your ADC or preamplifier’s maximum input voltage?
– Calculate expected output at maximum SPL (speaker or shout)
– Leave 6-12 dB headroom - Do you need tight matching for a microphone array?
– For 2+ microphones, specify tolerance ≤ ±1 dB (MEMS recommended)
The most important takeaway from this guide:
If your product has its own loudspeaker within 10 cm of the microphone, do not use a high-sensitivity microphone. Start low (-45 dBV/Pa or lower) and test upward.